~ 8 min read
How to Code Christmas Tree LEDs (and find their 3D Coordinates)

This Christmas, I decided to make our tree lights incredibly complex so that I could marvel at my own animations running on them. That’s tongue and cheek, but also ended up being very true.
I’d been inspired by mathematician Matt Parker in 2020 where he did this. In this post I’ll describe all the hardware I used and how it was connected and I’ll share the code I needed to write to capture the LED’s coordinates. Feel free to jump to the bits you’re interested in:
Find the video of this article on youtube
Equipment
This adventure begins in October of 2021 when I ordered these lights. There were a few other things I should have purchased at the same time: barrel connectors (typically used for security cameras), USB to barrel cables to supply power and some basic dupont wires (of the correct colour) to interface with a Raspberry Pi.
WS2811 LEDs
We have a fairly small tree, so I purchased 2 strings of 50 WS2811 LEDs. They’re only available in sets of 50 and you can chain each string together using connectors between them, so in my case I have ended up with a single string with 100 LEDs on it. These are commonly referred to as ‘NeoPixels’ but this is the name of the brand owned by Adafruit.
Each of my LEDs is individually addressable and has a WS2811 chip inside it (which is most common in these types of string lights). As they are individually addressable, it’s possible to change the colour and brightness of each individual LED without affecting any of the others on the string. So you could light up any one or many of the LEDs anywhere along the string length.
Unfortunately for me, I neglected to do much else until December when my wife expectantly unpacked our tree from the loft ready for decoration…
Power
When I purchased the lights, I had no clue how they could be powered. I spent a lot of time digging around on YouTube to find out.
As well as a male and female connector to connect each string together, each set also has two bare cables for DC power. Different manufacturers colour these wires differently, in my case ground is white and red/white striped one is +5V but if you buy some yourself you may have different colours.

I connected a barrel connector to these, which allowed the lights to be powered by a typical 5V power adaptor. Annoyingly, after having done this I then realised I had no power adaptors of this voltage or size! Instead I modified a USB charging cable to have the correct size male side of the barrel connector. You can pick up USB to barrel connectors from thepihut or pimoroni.

My lights are rated 5 volts, which is the same as USB chargers so I opted to use an Anker 5 port USB power adaptor, which provides multiple 5V USB outs. I decided to confirm this and that I’d wired things correctly using a multimeter. Nothing blew up or melted!
You could use one of these barrel cables to inject power to each set of lights as the power will tend to fade as it goes along the combined length. I decided not do this as it was unlikely running them all at full power.
Controller

To control the LEDs I first used a Raspberry Pi Zero, later followed by a 400 to tell each LED when to light up. I chose the 400 over the Zero so that I could easily use VSCode over SSH. The 40 GPIO pins that are readily accessible on the Pis make either perfect for this kind of project and I wanted network connectivity too. I hooked the lights ground wire (white) to physical pin 39 on the Pi and the data wire (green) on the lights to physical pin 12 (GPIO pin 18). I used some Elgoo multicoloured dupont wires for this. Conveniently using a Raspberry Pi also meant I could power everything from the same Anker adaptor too.

Animations
Visual Studio code working over SSH has been great for experimenting with live coding. It’s enabled me to sit on the other side of the room working on animations as if I was working on the 400 itself and has sped up my development loop massively for this project.
Coming up with the light animations has been interesting. I started with simple animations by switching 1 to 100 of the LED, on and then off again. Then I turned them all on and off giving a flashing effect. Well, flashing and turning lights on in succession isn’t particularly hard, but doesn’t make for the nicest complement to our living room lights during Christmas. If you look at your own lights, you might notice they make subtle brightness changes as well to make them more aesthetically pleasing.
Luckily there is prior work in this area, lots of code from people who have created more interesting animations than me using similar Pi based setups. Here’s a few of them I managed to get working.
- https://github.com/j3270/NeopixelChristmasTree
- https://github.com/FreesphereTom/neopixelscripts
- https://github.com/dmlond/raspberry_pi_neopixel

We’re all using the excellent adafruit python neopixel libraries to allow this. The libraries demo rainbow animation is actually one of the favourites in our house, so maybe coding them myself wasn’t necessary at all.
I also set the tree to flash to notify me of events. It will cycle the animations until it is notified of an event and flashes blue when I get a twitter follower and red when get a YouTube subscriber. This may seem a little vain - but honestly every time it happens it makes me smile a little.

Calculating 3D Coordinates
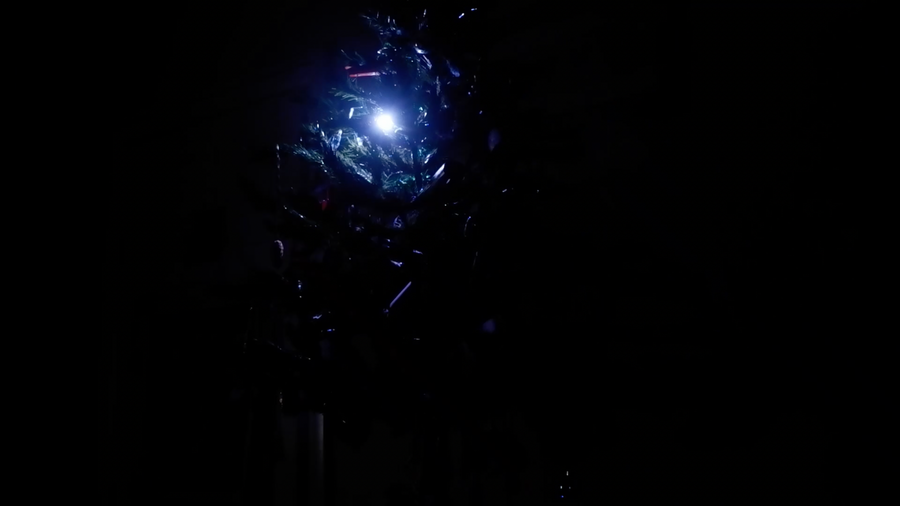
Lighting each LED based on its position on the string is great, but the animations tend to jump around depending on how the string has been arranged on the tree branches. This makes sense, given the string goes up and down as much asTo make more interesting animations, we need to know the LEDs 3D coordinates and to do that I’ve borrowed an idea from mathematician Matt Parker, lighting each individual LED one at a time in a dark room. I wrote some Python to trigger each of the 100 LEDs and capture a photograph of its position, which I planned to use to determine their X and Y coordinates. Then I rotated the tree 90 degrees, to repeat that entire photography process again to get the LEDs Z coordinate too.
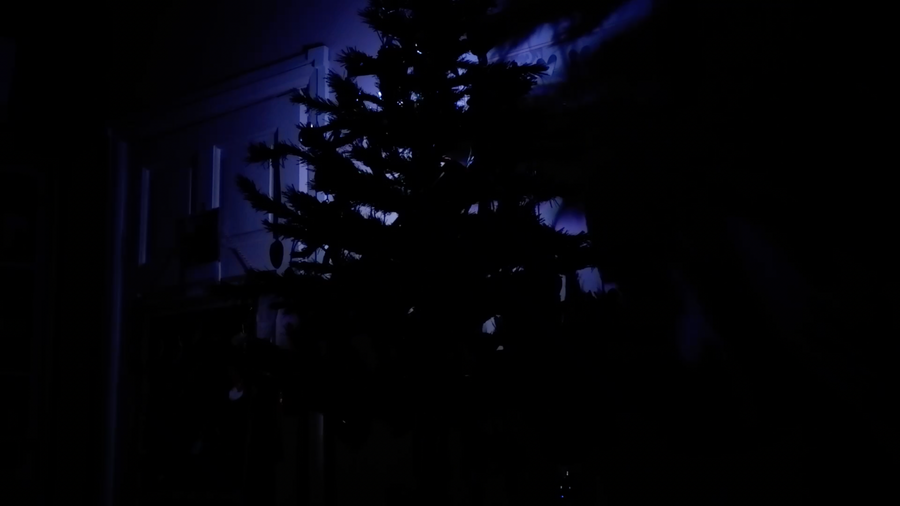
Our tree wasn’t in the best situation for this, it was covered in decorations and butted right up against the wall, so light is badly obscured in the photos I took. But I couldn’t tell my kids once the tree appears from the loft that they can’t decorate it - “Sorry kids, daddy just needs to calculate all the coordinates of lights on the tree”.
After looking at the ropey images I’d taken and realising all my basic mistakes, I didn’t want to spend much time trying to remember how to do image processing as I thought my results would be unreliable at best. I’m a software engineer and have had experience of things quickly getting out of scope. I spent a bit of time trying to do this in Python with OpenCV, before deciding it probably wasn’t the right route.
Let’s Do it By Hand
I coded basic web app using p5.js which lined up the image I’d taken from each camera angle side by side and allowed me to pick where I thought the LED was with the mouse - mechanical turk style if you like. Once these were submitted I moved on to the next two images. For each of the 100 LEDs, pointing and clicking over and over each time. All the results were written out to a text file, with each row in the file representing a different LED in the order they were in the strip. Coding the app and capturing it this way was probably all of a few hours work and I’ve published it to github.
I’m glad to say that this did appear to work, it allowed me to run Matts code on the tree along with a few of the other examples in his github. If you watch the video you can see it spinning in 3D in all it’s glory. I’d really would have liked to have a few more LEDs to experiment with here to increase the trees ‘resolution’.
Future Work
I had a blast putting this project together and experimenting with all the different animations. Next year I definitely will begin earlier though, armed with the code I now have. If you’re interested in hearing how I’ve taken the coordinates and rendered them on a canvas in 3D I’ll be going through it in a future post. Matt has also continued his tree adventures this year, creating his own format for rendering LED animations!