~ 5 min read
How to Deploy a Django App to the DigitalOcean App Platform
Digitalocean recently launched their App platform, a platform as a service (PaaS) which can be seen as a competitor to the likes of Heroku. As a Python developer, I wanted to see how easy it was to deploy a django app to App platform. It took me a little while to configure everything correctly so I thought I’d go through some of the points that tripped me up here.
I’ve been looking for some time for a relatively simple method for deploying my projects, but I also want to use a pattern where my repo is the primary source of truth for my app. Often getting this setup is mired in complexity of building my own pipeline to trigger a deployment when I make changes to my codebase. If you’re looking to ship, you probably don’t want to have hire an Ops person to manage it all for you or learn something like Kubernetes yourself before pushing to production. By making this the App platforms responsibility you’re free to worry about other things.
In this tutorial I’ll be walking through the steps I used to deploy a django app empty-django-app which shows a simple “Hello, world!” response from its main view. I do this using the main DigitalOcean interface and the CLI using an App specification yaml.
Pros:
- Continuous deployments with little pipeline configuration neccessary
- Simpler than using a cloud provider such as AWS or Google Cloud
- Many languages and frameworks supported
- Cheaper than Heroku - A simple App using both Postgres and Redis comes in at $90/mo on Heroku ($25 + $50 + $15) vs $42/mo on DigitalOcean ($12 + $15 + $15)
Cons:
- Only supports GitHub as a host at the moment (More hosts to be added soon).
- Less integrations out of the box than Heroku
- Lack of Documentation - However, the community is very active and I found questions I had were answered promptly.
Prerequisites
- A github account
- A digitalocean account with active payment method
- A working django app which you want to deploy available in github
- A requirements.txt or Pipfile in the root of the app defining dependencies and includes gunicorn
- [Optional] doctl, the Digitalocean Commandline Interface
Using the DigitalOcean Web App
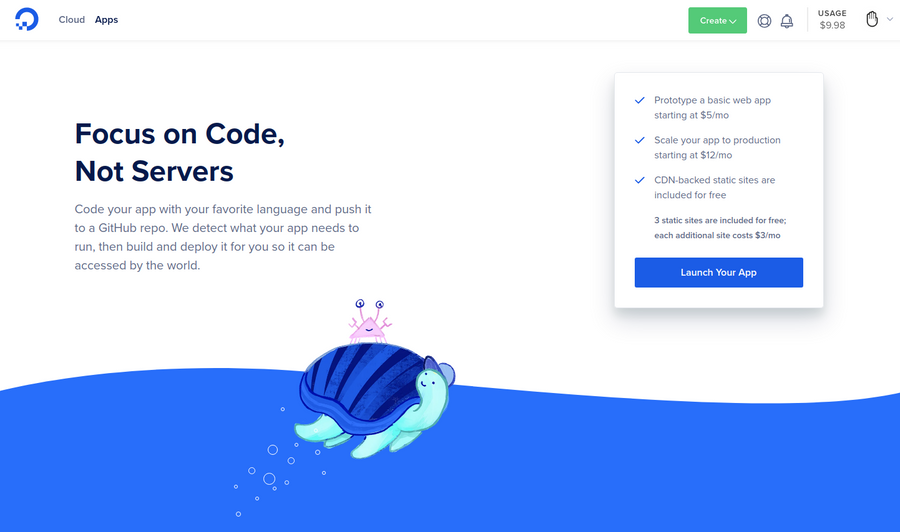
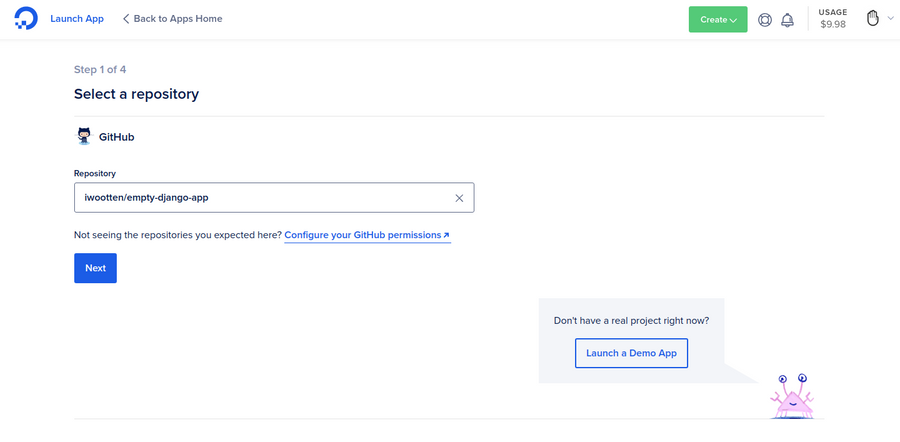
Firstly, DigitalOcean needs to know where to find your Django code. Head to the App Platform page and click on “Launch Your App”. The App platform only currently works with Github, so you need to give it permission to access your repositories there:
You’ll need to select the repository you want to deploy from. In my case, I’m using empty-django-app, which just returns “Hello, world!“:
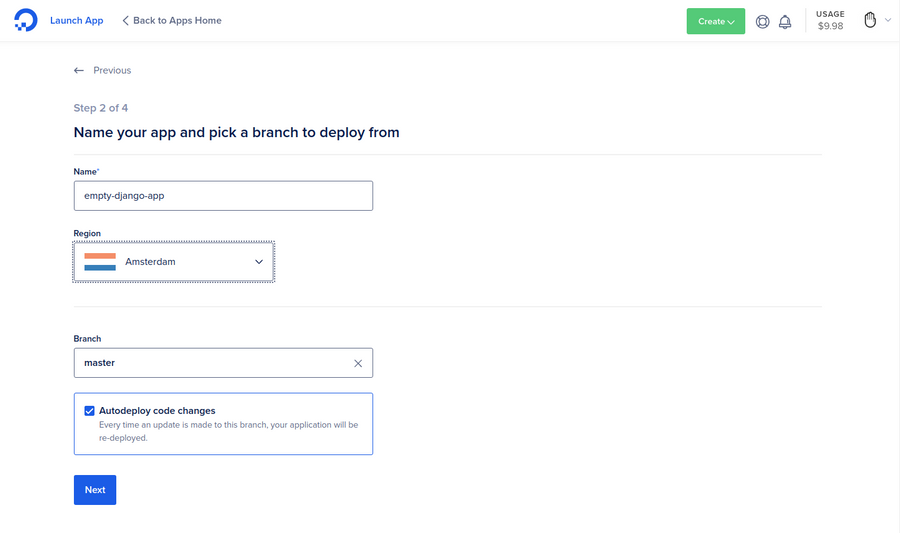
Select a name for your app, the region you want to use to deploy to and repository branch to deploy from. Also, ensure that the checkbox “Autodeploy code changes” is enabled. This is one of the great features of the App platform, allowing changes to immediately deploy once merged to a particular branch.
Next we’ll need to configure how our app is deployed. The App platform is able to understand we want to deploy a Python web service, but we need to change a couple of things to ensure the app is configured correctly.
Firstly, add an environment variable of APP_DOMAIN and set it to ${APP_DOMAIN}. This is a special App-wide environment variable that DigitalOcean defines and we use within our app to define the ALLOWED_HOSTS.
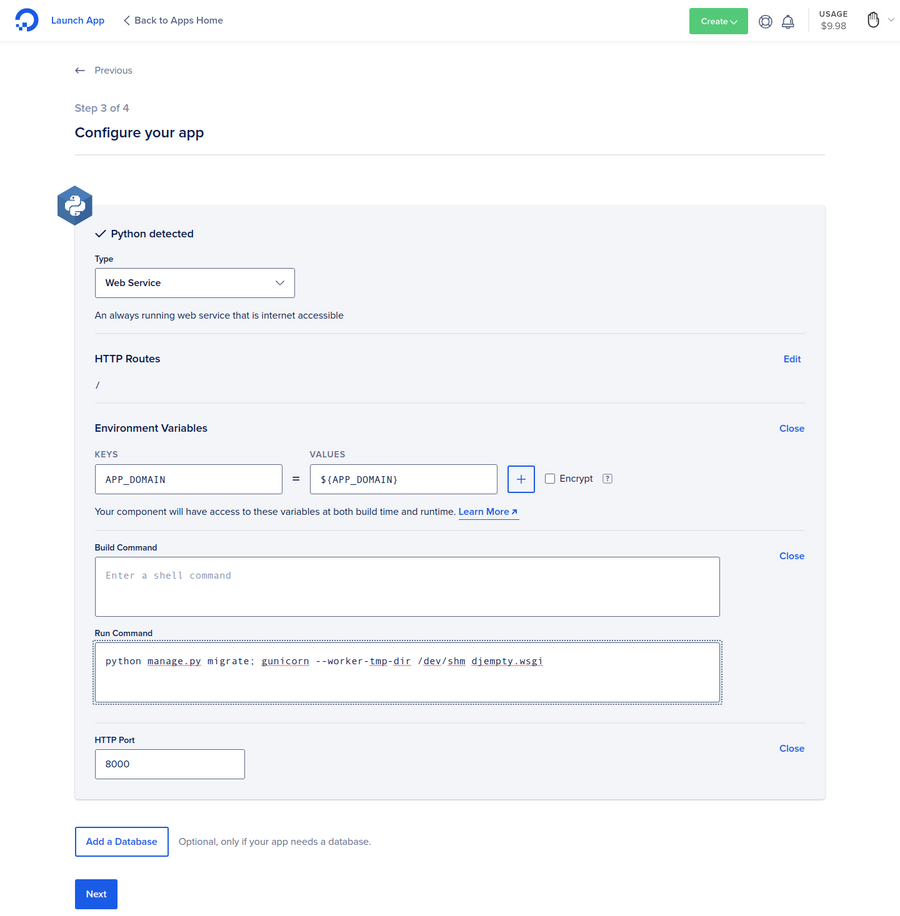
The run command is what we want to run each time our code is changed. Gunicorn needs to be defined to point to a temporary directory that the platform worker has access to and the appropriate wsgi file:
python manage.py migrate; gunicorn --worker-tmp-dir /dev/shm djempty.wsgiWe also need to change the HTTP_PORT to 8000, which gunicorn will be running from.
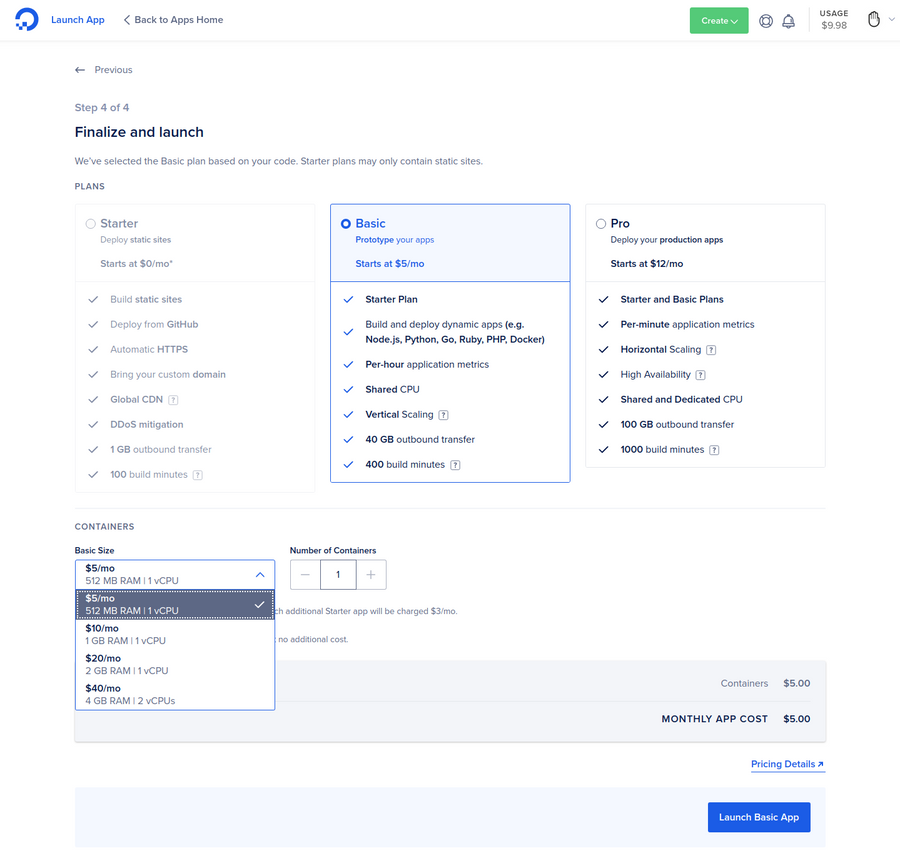
Finally, I’ll be using a single container on the $5/month plan because this is a test and I don’t want to accidentally get charged too much!
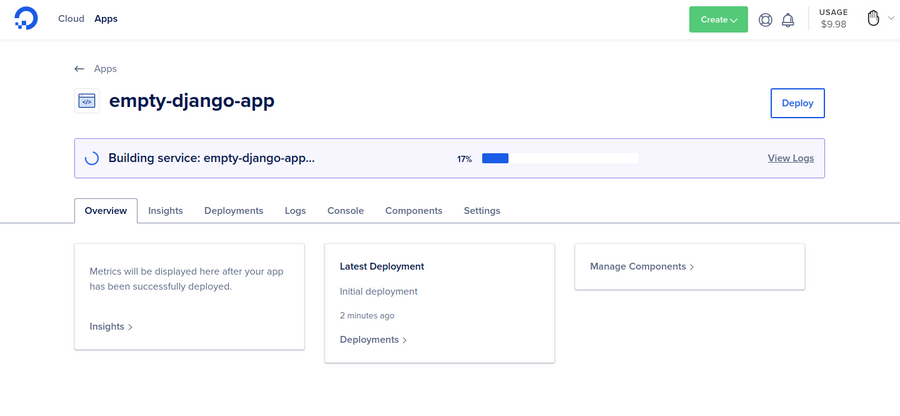
You can follow the deployment log to check how the build of your app is doing.
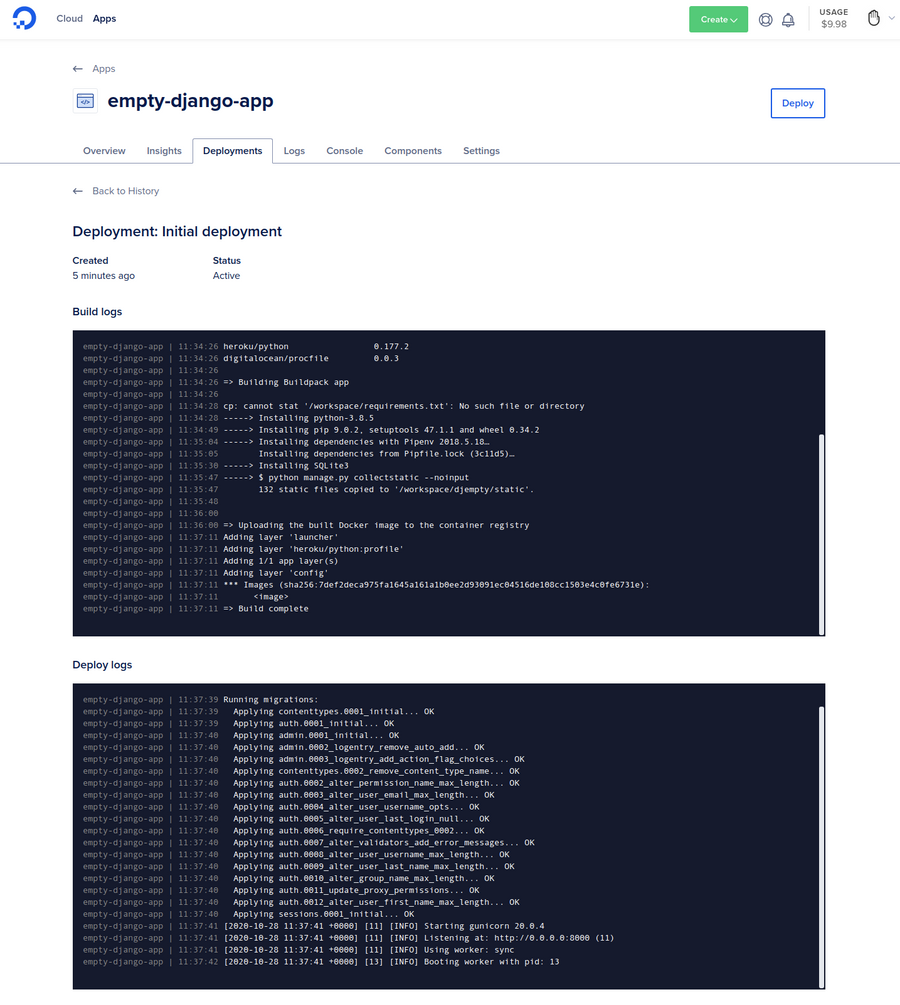
Hopefully, if everything is configured correctly, your deployment should complete successfully:
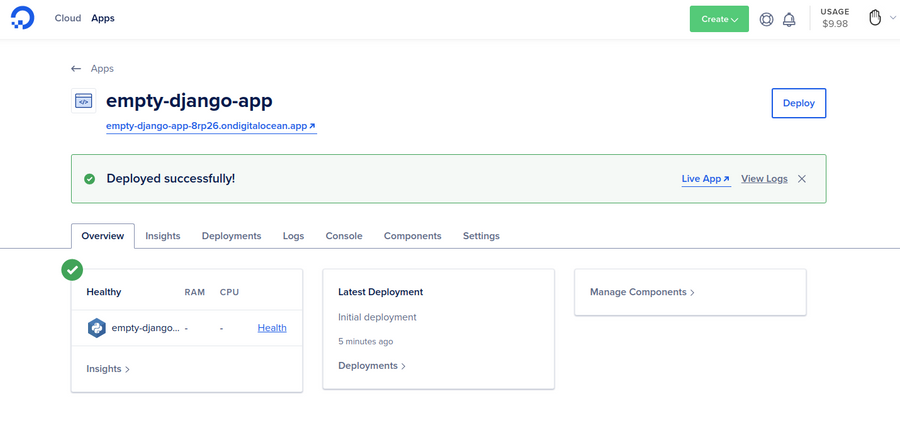
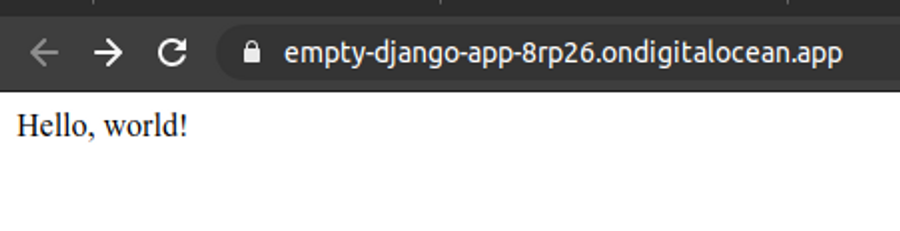
You should now be able to visit the endpoint in a browser and see the response from the main Django view:
Using the DigitalOcean CLI (doctl)
If you prefer using the commandline for your deployments, you can use doctl to deploy your Django app. Within my repo I’ve described the series of above steps as an App specification which doctl can use to deploy an app. You can see what each of the variables describe on the main reference page, but most of them should be clear from the above steps.
You need to configure doctl with an appropriate API key from the “Account > API” page. Once this is done and you have downloaded the config.yaml, you create a new app by calling:
doctl apps create --spec config.yamlYou should see a response like:
Notice: App created
ID                                      Spec Name           Default Ingress    Active Deployment ID    In Progress Deployment ID    Created At                                Updated At
7ebdb71d-e1cf-400a-a795-40576ec9fa87    empty-django-app                                                                            2020-10-28 12:52:17.81988127 +0000 UTC    2020-10-28 12:52:17.81988127 +0000 UTC
If you then head to the DigitalOcean web site, you should see your app deploying much the same way as before on your apps homepage.
Conclusion
I’ve covered the basics of the DigitalOcean App platform here by deploying a simple Django application using the main user interface and doctl. This app is now configured to automatically deploy any changes made to my Django application as soon as they are merged to the main branch on Github.
I think the platform offers really good value compared to other providers, where costs can really ramp up as the complexity of the project becomes non-trivial. With its launch I’ll now be able to ship ideas much more quickly without too much worry of the costs or complexity involved.